Getting Started: Your Automotive Lift Installation Journey Begins

Successfully performing an automotive lift installation is a big job for any garage or repair shop. It's not just about getting a new tool. It's about making work easier, keeping everyone safe, and making sure your investment lasts a long time.
If you're looking for a quick guide on how to install an automotive lift, here are the main steps:
- Plan Your Space: Measure your ceiling height, check floor strength, and understand local rules.
- Prepare the Concrete: Make sure your concrete floor is thick and strong enough.
- Assemble Components: Put together the lift's main parts, like the posts and carriages.
- Anchor the Lift: Securely bolt the lift to the concrete floor.
- Connect Utilities: Hook up all electrical wires and hydraulic lines.
- Perform Safety Tests: Do a test run with weight and check all safety features.
Installing a car lift on your own is no small matter. It needs careful planning and strict attention to detail. This guide from AutoTech Solutions will walk you through each step. We’ll help you ensure your lift is installed safely and correctly. This protects your team, your vehicles, and your business.

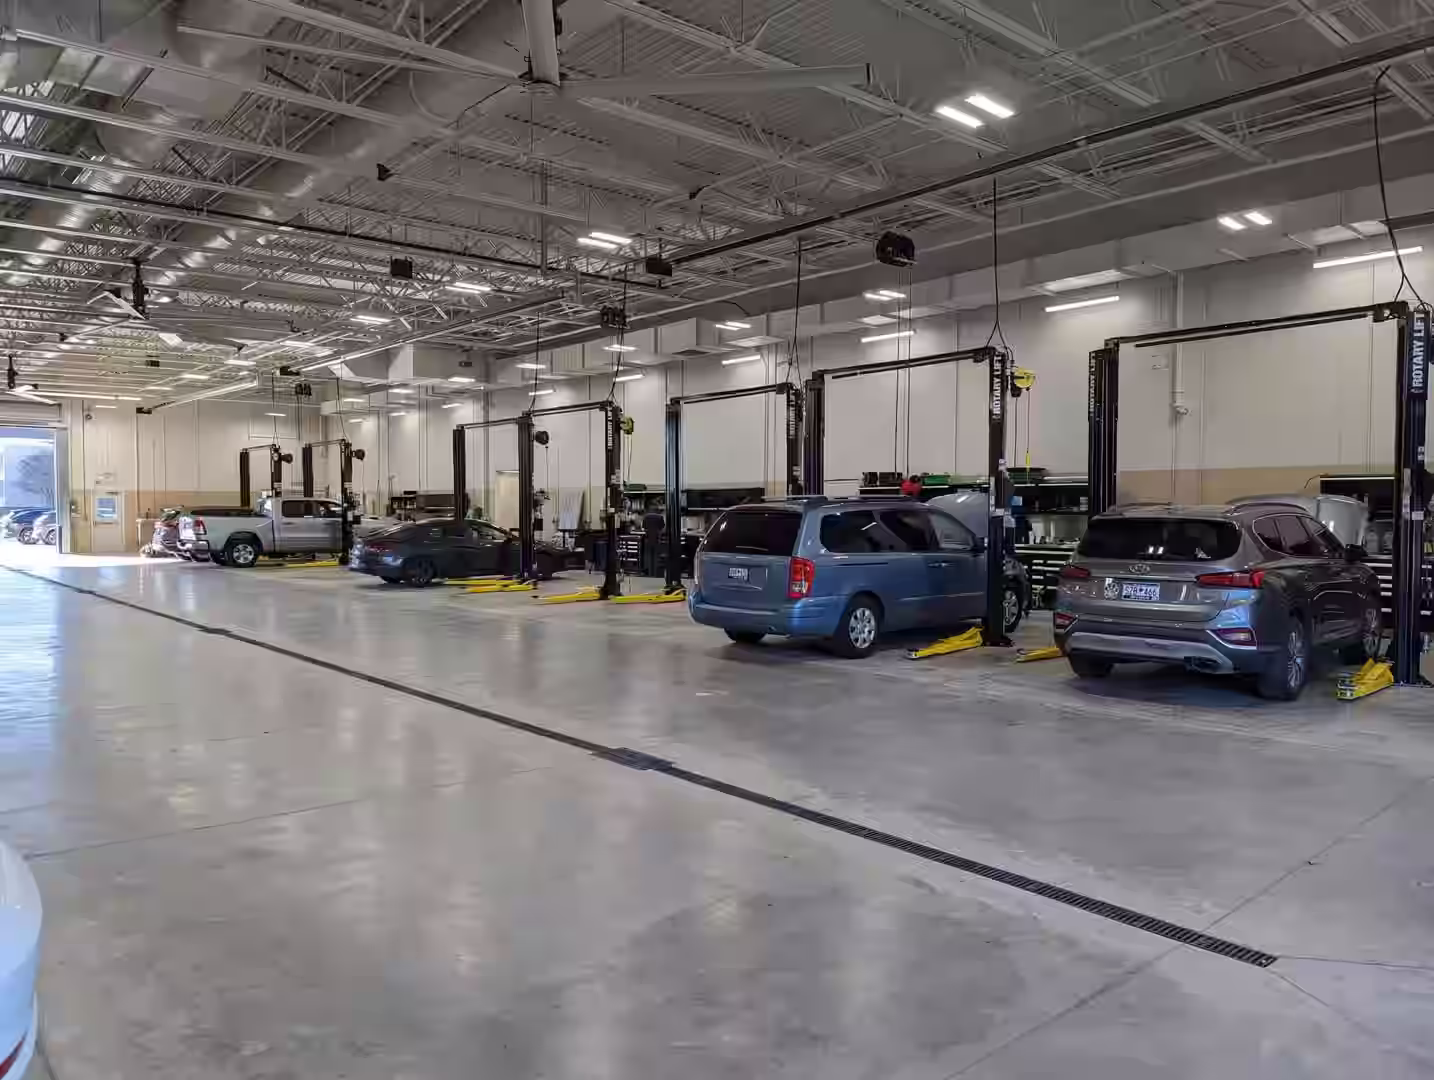
Choosing the Right Equipment for Your Automotive Lift Installation
Before we grab the hammer drill, we need to make sure we’re installing the right "beast" for the burden. Walking into a showroom or browsing our Products page can feel like being a kid in a candy store—except the candy weighs 12,000 pounds and helps you change transmissions.
Choosing the right lift depends on your shop's specific needs in Michigan or the Carolinas. Are you doing quick oil changes, heavy-duty diesel repairs, or just trying to double your parking space in Raleigh?
Comparison of Popular Lift Types
| Feature | 2-Post Lift | 4-Post Lift | Scissor Lift |
|---|---|---|---|
| Best Use | General service, wheels-free work | Storage, alignment, heavy trucks | Quick service, brake work, body shops |
| Footprint | Medium | Large | Small to Medium |
| Installation | Permanent (Anchored) | Can be bolt-down or portable | Surface or Flush-mount |
| Concrete Req. | Very Strict (3000+ PSI) | Moderate | Strict (for flush mount) |
When you select a lift, look for the "Gold Label." The Automotive Lift Institute (ALI) certification is the industry standard for safety. We always recommend checking out the Lifting It Right Safety Manual to understand the rigorous testing these machines undergo.
Key Specifications and Capacity
Don't just guess the weight of the trucks coming into your Charlotte shop. You need to look at the numbers.
- Weight Ratings: Most passenger car lifts start at 7,000 to 9,000 lbs. If you’re handling heavy-duty pickups in Wade, NC, you’ll want to look at 12,000 to 18,000 lb capacities.
- Arm Reach: Two-post lifts use arms to reach the vehicle's frame. Ensure the arm reach (min/max) fits the wheelbases of your most common customers.
- Drive-Through Clearance: This is the distance between the columns. If you service wide dually trucks, you need a lift that won't scrape their fenders.
- Rise Height: Standard lifts offer about 75 to 82 inches of rise. Make sure your tallest tech doesn't have to hunch over!
For top-tier reliability, we often point our clients toward Rotary Lift solutions. They set the mark for quality in heavy-duty environments.
Power and Space Considerations
Your shop’s "diet" of electricity matters.
- Voltage: Most professional two-post lifts require a 220V/230V single-phase circuit. Some smaller four-post "storage" lifts can run on standard 110V, but they rise much slower.
- Motor Horsepower: A typical 12,000 lb lift uses a 2 HP motor.
- Bay Dimensions: You need more than just the lift's width. You need "swing room" for the arms and "walk room" for the technicians. We recommend at least 6 feet of clearance on the sides and front of the lift.
If you are looking for versatile, certified options, check out the Forward Lift options available through our service centers.
Pre-Installation: Concrete and Site Requirements
We have a saying in the industry: "A lift is only as strong as the floor it stands on." If your concrete is crumbly or thin, that 10,000 lb truck is just a very heavy paperweight waiting to tip over.

The Foundation Checklist
Before the automotive lift installation begins, we must verify the slab:
- Concrete Depth: Most lifts require at least 4 inches of concrete. However, for heavy-duty lifts (12,000 lbs+), 6 to 12 inches is the ideal sweet spot.
- Compression Strength: The concrete needs a minimum rating of 3,000 PSI. For some high-capacity models, 4,000 PSI is required.
- Cure Time: If you just poured a new floor in your Novi, MI facility, you must wait at least 28 days for the concrete to reach full strength before drilling.
- No-Go Zones: Never install a lift over expansion joints or major cracks. Anchors must be at least 6 inches away from any seam.
For a deeper dive into the technicalities, see this Guide to How to Install a Car Lift. If you're feeling overwhelmed, our team offers professional shop design and consulting to help you map out the perfect layout.
Floor Leveling and Anchor Spacing
Concrete floors are rarely perfectly flat. Most lifts allow for a slope of less than 3 degrees. If the floor is more slanted than that, you might need to pour a new level pad.
- Shimming: We use metal horseshoe shims to make the columns perfectly "plumb" (vertical). However, you generally cannot exceed 1/2 inch of total shim thickness.
- Plumbness: If the columns aren't vertical, the carriages will bind, and the lift will wear out prematurely.
Overhead and Wall Clearances
Don't forget to look up!
- Ceiling Height: A standard 2-post lift usually requires a 12-foot ceiling. Some high-setup models need nearly 15 feet.
- Wall Offset: For asymmetric lifts (where the arms are angled), you generally need at least 9 feet of clearance from the wall to ensure the vehicle doors can open.
- Obstructions: Watch out for overhead heaters, lights, and garage door tracks. There’s nothing worse than lifting a customer’s SUV right into a fluorescent light fixture.
Step-by-Step Automotive Lift Installation Process
Now for the heavy lifting. We recommend having at least one or two helpers. These components are made of heavy-duty steel, and trying to manhandle a column alone is a recipe for a trip to the ER.
Step 1: Layout and Chalk Lines
We start by marking the floor. We chalk a rectangular "box" where the columns will sit. We measure diagonally from corner to corner to ensure the columns are perfectly "square." If the columns are even an inch out of alignment, the equalizing cables won't work correctly.
Step 2: Drilling the Anchor Holes
Using a rotary hammer drill and a 3/4-inch carbide-tipped bit, we drill the holes.
- Pro Tip: Drill one tower’s holes first, anchor it, and then use the overhead beam to perfectly position the second tower before drilling its holes.
- Dust Removal: Use a vacuum or compressed air to blow the dust out of the holes. If there is dust in the hole, the anchor won't "bite" the concrete properly.
Step 3: Anchoring and Shimming
We tap the anchors through the base plate and into the floor. Then, we use a torque wrench to tighten them.
- The Magic Number: Most anchors require 85 to 150 ft-lbs of torque. If you can't reach that torque because the anchor keeps spinning, your concrete is too soft, and you'll need to pour a reinforced pad.
If this sounds like a lot of work, that's because it is! Many shop owners in Charlotte and Raleigh prefer our expert installations and facility buildouts to ensure it's done right the first time.
Mechanical Assembly and Component Integration
Once the columns are standing tall and bolted down, we move on to the "guts" of the machine.
- Overhead Beam: This connects the two columns and houses the safety shut-off bar. We lift this into place (usually with two people on ladders) and bolt it from the inside out.
- Carriages and Cables: The carriages are the parts that actually move up and down. We connect them using equalizing cables. These ensure that both sides of the lift rise at the exact same speed.
- Arm Restraints: These are small gears that lock the arms in place once the lift starts to rise. They are critical for preventing the vehicle from shifting.
Electrical and Hydraulic Connections in Automotive Lift Installation
This is where the power happens.
- The Power Unit: This is the motor and pump assembly. It usually mounts to the "main" column.
- Hydraulic Lines: We run high-pressure hoses from the pump to the cylinders inside the columns.
- Hydraulic Oil: Most lifts require about 10 to 12 quarts of ISO 32 non-detergent hydraulic fluid.
- The Electrician: In the Carolinas and Michigan, local codes usually require a certified electrician to handle the final hookup to the 230V service.
For more visual learners, the Automotive Lift Institute safety videos are a great resource for seeing these components in action.
Post-Installation Testing and Safety Protocols
The lift is up, the oil is in, and the power is on. But don't put a car on it yet! We need to "bleed" the system.
Bleeding the Air
Hydraulic systems hate air. We cycle the lift up and down several times (without a vehicle) to push air out of the cylinders and into the reservoir. You’ll hear some "hissing" and "burping"—that’s normal.
The Load Test
Once the air is out, we perform a load test.
- Low Lift: Raise a vehicle about 6 inches off the ground.
- The Shake Test: Give the vehicle a sturdy (but careful) rock. It should be solid. If it wobbles, check your adapter placements.
- Full Rise: Raise the vehicle to full height and listen for the "clicks." Those are the safety latches.
- Lowering onto Locks: Never work under a lift supported only by hydraulics. Always lower the lift until it rests on the mechanical safety locks.
Safety is our top priority at AutoTech Solutions. We provide ongoing service and equipment support to ensure your lift stays as safe as the day it was installed.
Long-Term Maintenance for Your Automotive Lift Installation
An automotive lift installation isn't a "set it and forget it" project.
- Daily: Check for hydraulic leaks and ensure the safety latches are clicking.
- Monthly: Check the torque on your anchor bolts. Concrete can settle, and bolts can loosen.
- Annually: Lubricate the chains, check cable tension, and have a professional ALI-certified inspection.
Frequently Asked Questions about Car Lifts
What is the minimum concrete thickness for a car lift?
For most light-duty lifts, 4 inches is the absolute minimum. However, we strongly recommend 6 inches of 3,000 PSI reinforced concrete for better stability and longevity. If you have any doubt about your floor, a core drill test is a cheap way to avoid a million-dollar mistake.
Can I install a 2-post lift on a 110V circuit?
Generally, no. Professional 2-post lifts require a 220V/230V single-phase, 30-amp circuit. Using an undersized circuit can burn out the motor and cause the lift to stall under load. Always consult a licensed electrician to ensure your shop's wiring can handle the boost.
How often should I inspect my automotive lift?
You should perform a basic safety check every single day before you lift the first car. You should check anchor bolt torque monthly. Most importantly, the Automotive Lift Institute (ALI) recommends a comprehensive professional inspection once a year.
Conclusion
From the initial planning to the final load test, an automotive lift installation is a journey that transforms your shop's capability. Whether you are in Novi, Michigan, or the heart of Raleigh, North Carolina, having a properly installed, certified lift is the backbone of a successful automotive business.
At AutoTech Solutions, we pride ourselves on being your one-stop-shop. From sales and shop design to the nitty-gritty of installation and preventative maintenance, we’ve got your back. Our goal is to minimize your downtime with expert support and fast response times across our service areas.
Don't leave your safety to chance. If you’re ready to take your shop to the next level, Schedule your professional automotive lift installation today and let our experts handle the heavy lifting.